One way to maintain a website is to develop your entire website on your local machine and have the WebStorm IDE automatically upload to your remote host any changes you make locally. This strategy is by far faster than using SFTP to transfer each file up to your server when you’ve made a change to them. Its also better in that you automatically maintain a backup of your site on your local machine which you wouldn’t have if you SSH-ed into your host and modified the files directly on your host.
To set this up we need to do the following:
- Request a Free (for Students) copy of WebStorm
- Create a new WebStorm project
- Create a remote server configuration in WebStorm
- Download the files you already have on your remote host to your local pc
Request WebStorm for Free
JetBrains allows students to download WebStorm for free. So follow this link and request the free download. Please use your BC email address when applying for the student account.
Once you have the download file, install the software.
When installing the software, you’ll need to activate the software. To do so, Choose Get License From: JB Account and enter your BC email address and JB password.
Create a New Empty WebStorm Project
From the WebStorm initial window select Create New Project. Choose Empty Project and in the location field choose a name for the folder on your local machine that you will put all of your web site files in. I chose to put all of my web files in a folder named public_html since that is the name of the folder that Godaddy created for our web files on the host server. That makes my local file system an exact mirror of my remote file system.
Create a Remote Server Configuration in WebStorm
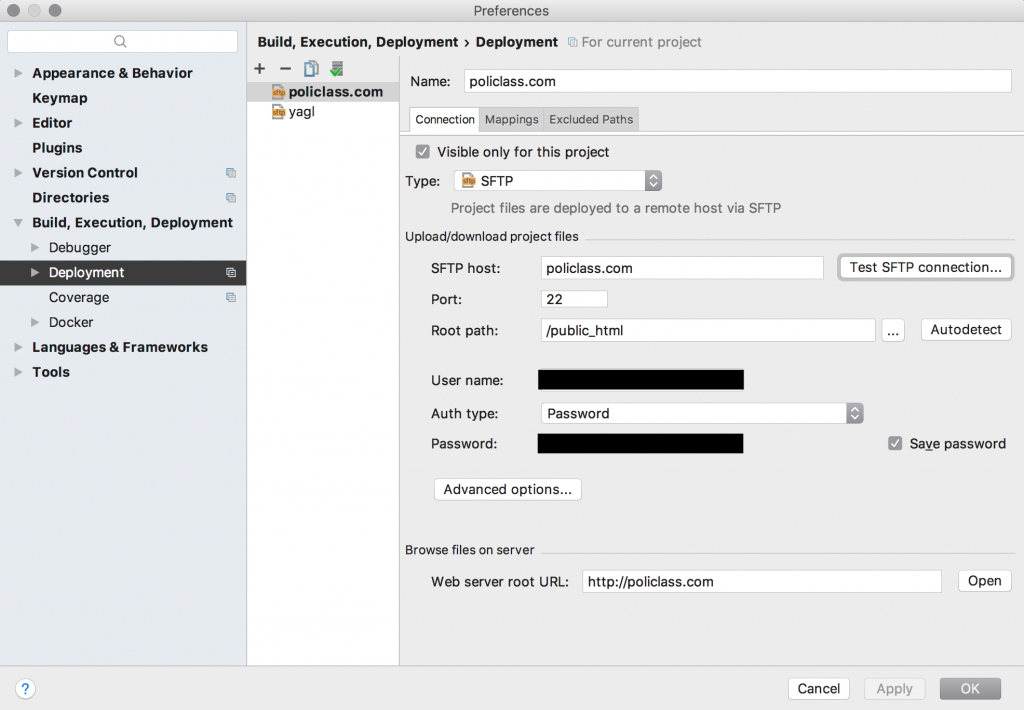
The following instructions are from the WebStorm tutorial found here. To create a remote server configuration, choose File->Settings->Build,Execution,Deployment->Deployment from the main menu bar. Then click the (+) button in the center pane to create a new deployment configuration. Give the deployment a name and choose SFTP for the type. Enter your domain name in the SFTP host field and enter your cPanel username and password in their respective fields. Check the Save password check box.
I’ve included my deployment configuration screens below for comparison. Note: I’m using a Mac so the screens may appear slightly different on a Windows machine.
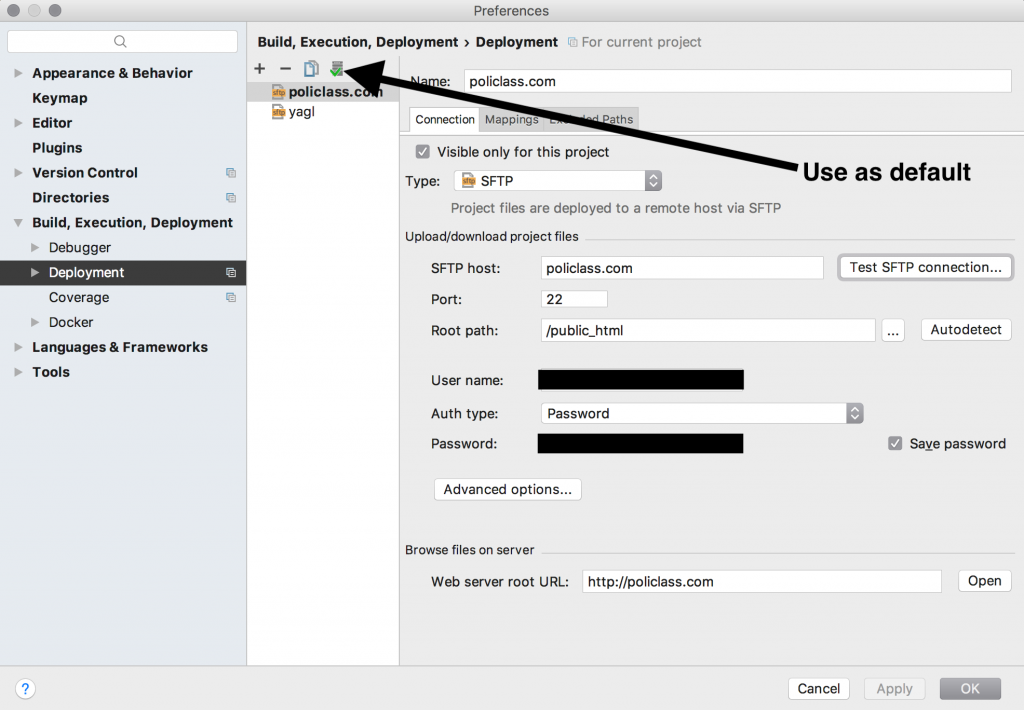
Set the server deployment as the default deployment by pressing the Use as default button.
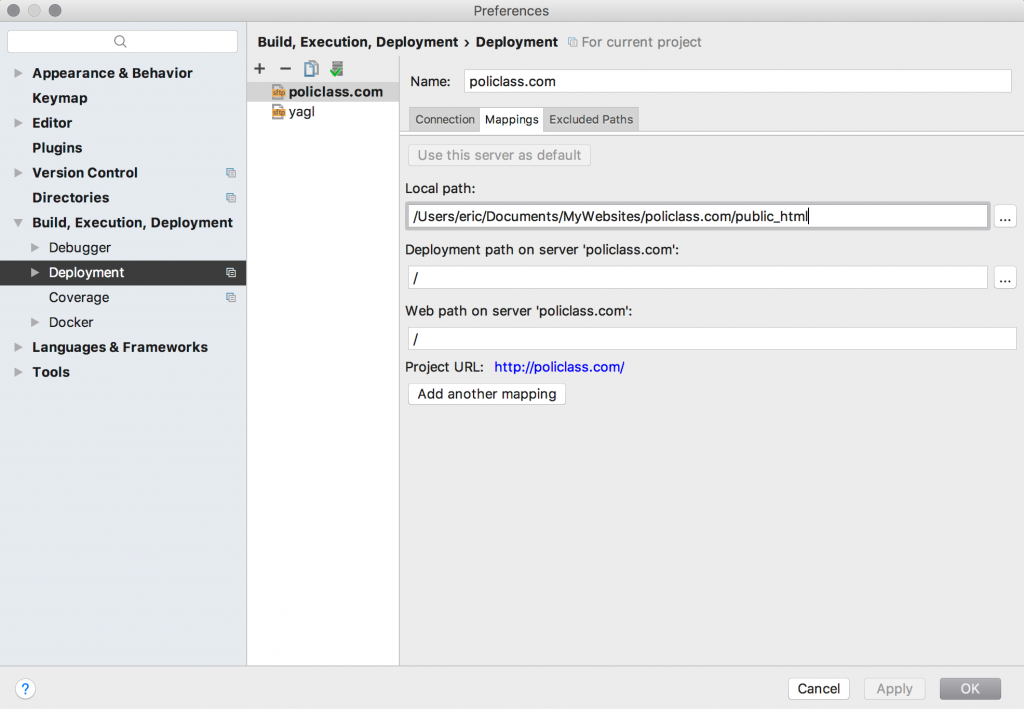
Click on the Mappings tab and configure it similar to the mapping shown below. Change the Local path field to point to your WebStorm project’s directory. This is the same directory that you chose when you created the project.
Next, configure WebStorm to automatically upload changes to your remote host. The instructions below are from the tutorial found here.
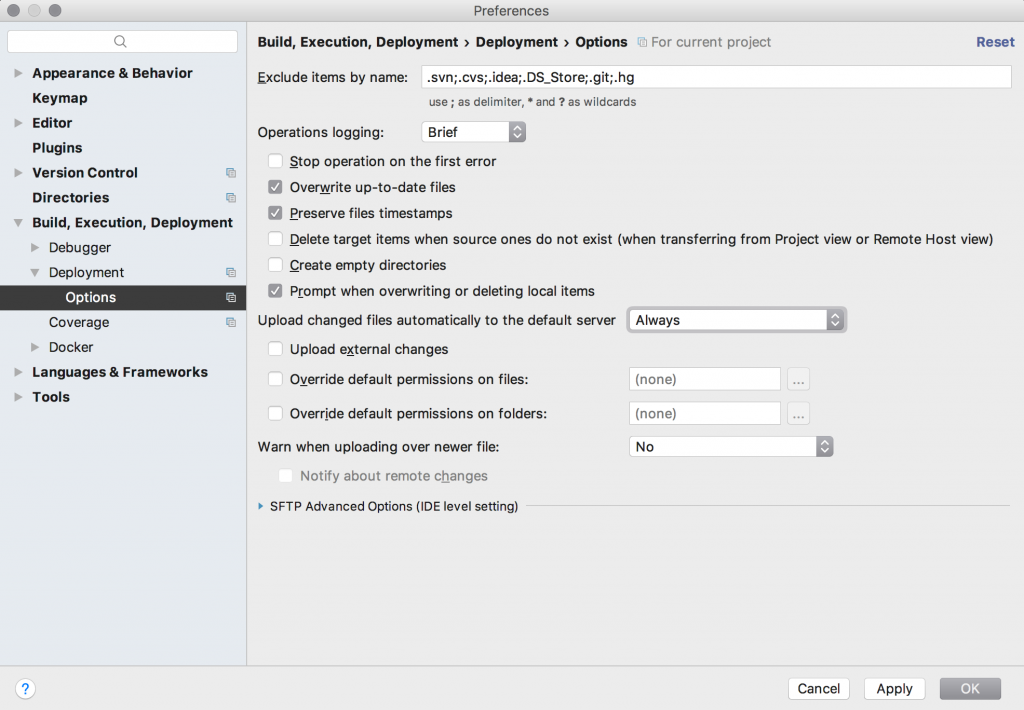
In the left hand pane, click the triangle next to Deployment to reveal Options. Select Options and select Always from the drop down menu next to Upload changes files automatically to the default server as shown below.
Click Apply to save and OK to close the deployment configuration window. You are now ready to start adding files to your web site.
Download the Files on Your Remote Host to Your Local PC
If you’ve already uploaded files to your remote host with SFTP or if you’ve created files directly on your host by logging in remotely with SSH, then you may need to download to your local computer the files (and directories) that are already up on the remote host.
To do so, on the toolbar, press Tools -> Deployment -> Browse Remote Host. This will open a new pane on the right hand side of the IDE that shows you all of the files on your remote host. To download a folder or file, highlight the folder or file then click your mouse button to bring up an options menu. Choose Download from here. When you do, the file or folder (with contents) will be copied from the remote host to your local machine. You may need to collapse then expand your project root on the left hand pane in order to see the copied contents.
© 2020, Eric. All rights reserved.